Upgrade from Tripal v2 to v3
Note
If you are installing Tripal v3 for the first time you can ignore these upgrade instructions.
Step 1: Upgrade Tripal
- Please note the following before upgrading:
Warning
If you have created custom extension modules for your site please note that deprecated API functions from Tripal v1.x have been removed from Tripal v3. Therefore, use of deprecated API functions in templates or custom modules may cause a “white screen of death” (WSOD). Check the server logs if this occurs to find where deprecated functions may be used.
Warning
Remember to perform a full backup prior to any upgrade. It is recommended to test upgrade on a copy or development version of your site prior to performing on the production site.
Warning
Upgrade can only be performed using ‘drush’ command.
Warning
If you have made customizations to Chado you may encounter problems during the upgrade. It is not recommended to ever change any of the existing tables of Chado. However, if you have and if you do encounter such issues, please use the Tripal Issue queue to request help: https://github.com/tripal/tripal/issues
If you have custom Drupal fields attached to Tripal nodes then the content in those fields will not automatically be migrated to the new Tripal v3 entities. Bradford Condon has provided some instructions to help migrate these fields after the site has been upgrade. You can find those instructions here.
- Put the site in maintenance mode. Before completing any upgrade you should put your site into “maintenance mode”. This ensures that users are isolated from any temporary error messages generated through the process. To put the site in maintenance mode, navigate to Administration > Configuration > Maintenance Mode . Then click the Put site into maintenance mode checkbox and click Save Configuration. Additionally, there is a text area on this page that allows you to customize the message displayed to your users while your site is in maintenance mode.
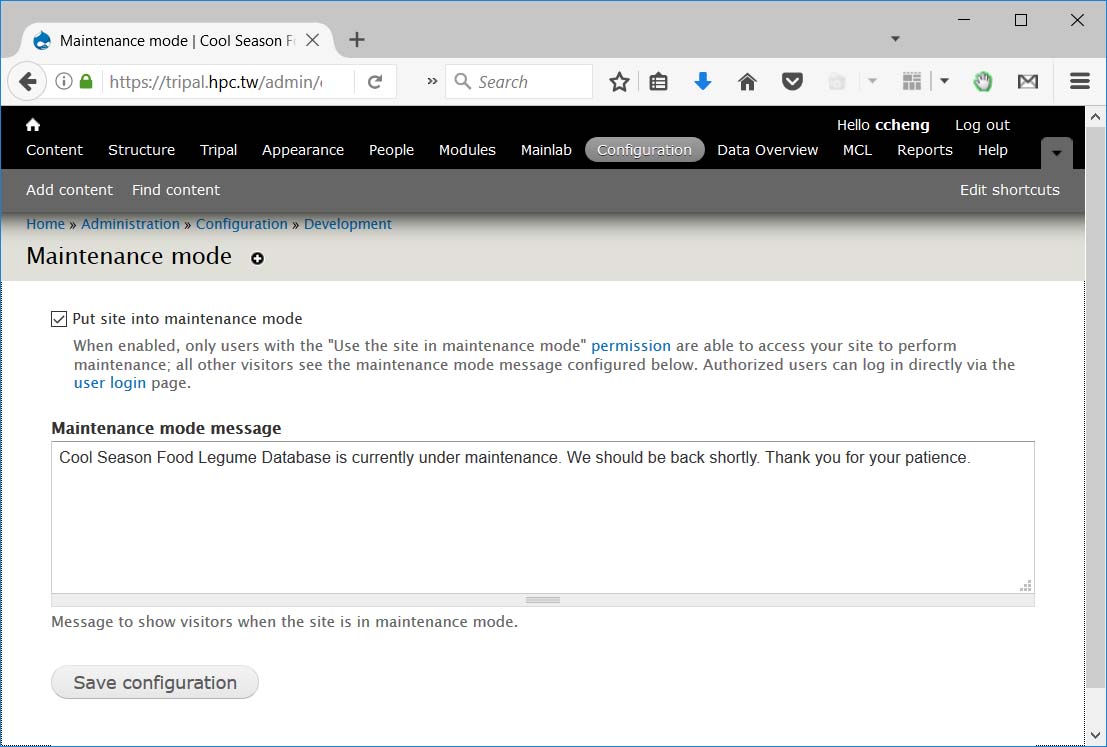
You can also put your site into “Maintenance mode” using drush be executing the following command:
drush vset site_offline 1
- Disable tripal modules.
Before updating the Tripal codebase, you should disable all Tripal modules. This ensures that Tripal is not actively trying to access files that you are changing, as well as, clears any cached information for these modules. When using drush, disabling the core module will disable all other Tripal modules:
drush pm-disable tripal_core
- The Tripal modules must also be downloaded and updated. To do this, delete the old Tripal v2 modules directories, located in
sites/all/modulesfrom your Drupal root: for example/var/www/html/sites/all/modules(be sure you have a backup before removing). The following command will retrieve the Tripal 3 version:
drush pm-download tripal-7.x-3.5
- Enable the tripal module
drush pm-enable tripal
- Enable the tripal_chado module
drush pm-enable tripal_chado
- Enable Tripal v2 Legacy modules. Tripal v2 modules are now called ‘legacy modules’. these are the modules that were disabled in step #2. For backwards compatibility, you should re-enable these modules:
drush pm-enable tripal_core, tripal_views, tripal_db, tripal_cv, tripal_analysis, tripal_organism, tripal_feature, tripal_pub, tripal_stockBe sure to enable any additional modules not included in the example drush command above. The easiest way to ensure you have re-enabled all the modules disabled above is to copy the list drush provided when asking you to confirm disabling tripal_core above.
(Optional but Recommended) Enable the Tripal DS (provides default themeing for Tripal 3.x) and Tripal Web Services.
- Tripal DS: Tripal 3.x provides complete integration with Drupal’s Display UI allowing you to re-order fields and customize display using Drupal Extension modules. The Tripal DS module provides Tripal Panes similar to those in Tripal 2.x (except that more then one pane can be open at a time) and groups fields by default to make the display less overwhelming.
- Tripal Web Services: Tripal Web services provide a way for Tripal sites to share data with each other and with their community in a programmatic manner. Your web services will show the same content available through your Tripal site using the RDF Specification.
drush pm-enable tripal_ds tripal_ws
Tripal Daemon provides automatic job execution and was previously a tripal extension module but is now part of the main Tripal package. If you had Tripal Daemon installed with Tripal 2 and you would like to continue using it follow these instructions. First, disable the module and remove the module directory.
drush pm-disable tripal_daemonNext remove the original tripal_daemon module from the sites/all/modules directory of your site. If you have had the Tripal Daemon installed for Tripal 2 then you should have all the necessary prerequisites and you can simply re-enable the module:
drush pm-enable tripal_daemonNote
Remember to restart the tripal_daemon once you have completed the upgrade.
- Return to your Tripal site, and click the link that appears for preparing Chado and launch the job.
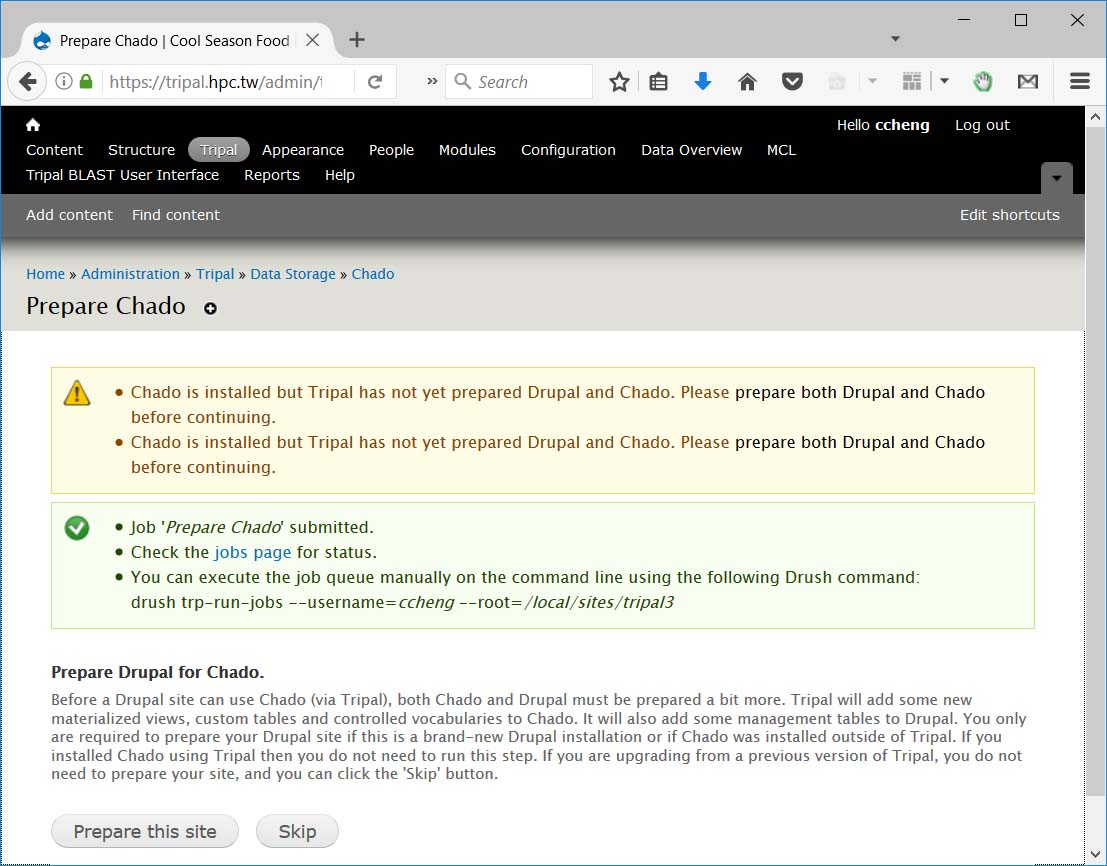
Note
You may see the message “Please update the database using “drush updatedb” before continuing” You can safely ignore this message and it should disappear after preparing Chado.
- Next, navigate to the permissions page at Administration > People > Permissions and ensure that all new Tripal permissions are set appropriately for your site roles.
Note
Tripal v3 adds a variety of new permissions so please check the permissions carefully.
- You can now bring your site out of maitenence mode. This can be done by either reversing the your actions through the interface in #1 or through drush with the following command:
drush vset site_offline 0
- Software Upgrade Complete! At this point your site is running Tripal 3. You currently have all your Tripal 2 pages (known as nodes) living happily inside your upgraded Tripal 3 site. This is known as “legacy mode”. The upgrade process was designed to allow you to upgrade to Tripal 3 first and then migrate your “nodes” slowly to the new “entities” as you are able. Migrating from nodes to entities provides greater flexibilty and access to newer Tripal 3 features.
Step 2: Migrate Content
The process allows you to create Tripal 3 content types exposing the same data as your Tripal 2 nodes. Data is not duplicated as it resides in Chado but rather mappings are made between Chado records and your new Tripal 3 entities just as they were made to Tripal 2 nodes. This step will not remove or destroy existing Tripal v2 nodes/pages but will create new Tripal v3 entities/pages. This allows you to keep existing pages while reviewing and customizing the Tripal v3 content types. Site visitors can continue to visit the Tripal v2 pages. Tripal v3 content types may remain private while customization is underway. Once customization is completed a subsequent step will allow you to swap out Tripal v2 pages for the newer Tripal v3 pages. Once this step is complete, you will also be able to expose your data via Tripal 3 Web Services immediately.
- Navigate to Administration > Tripal > Data Storage > Chado and click on Step 2.
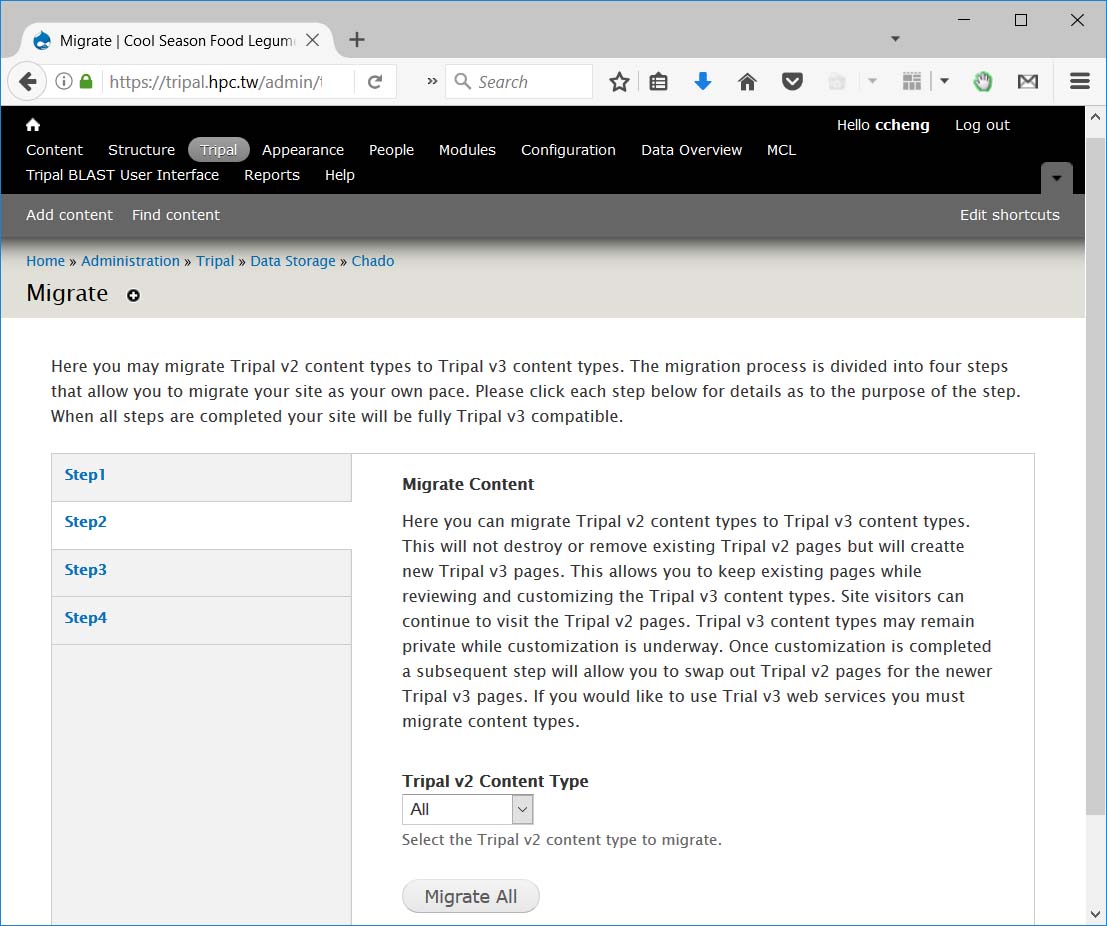
- Select an individual content type to migrate from the Tripal v2 Content Type drop-down.
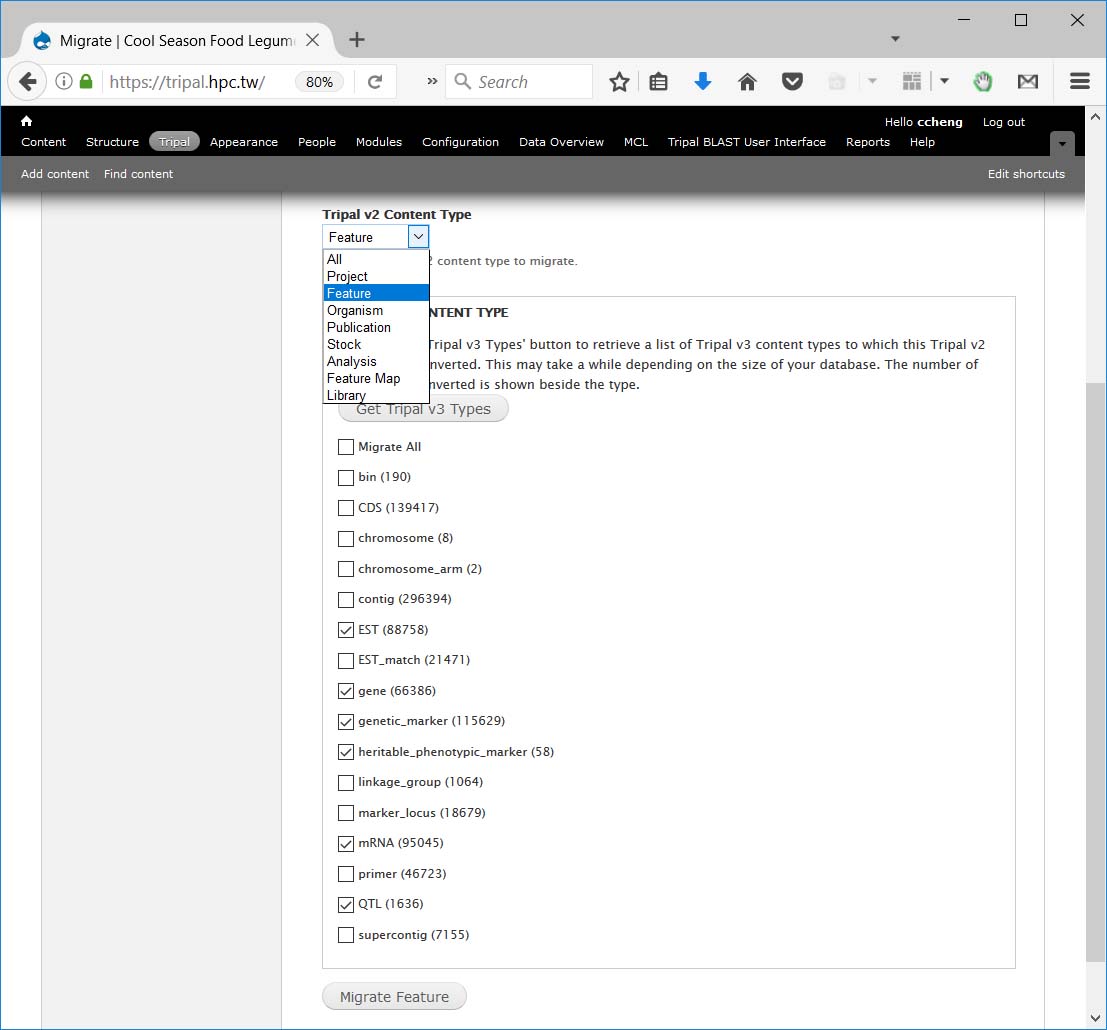
- Click the ‘Get Tripal v3 Types’ button to retrieve a list of Tripal v3 content types to which this Tripal v2 type can be converted. This may take a while depending on the size of your database.
- Select the checkbox beside each Tripal v3 type you would like to create. The number of entities/pages that will be created for that content type is shown in brackets beside the name.
- Then click the “Migrate [Tripal v2 Type]” button. This will submit a Tripal job to create the requested content. Submit this job manually on the command-line as follows (note we
cdto the project root at/var/www/html: please navigate to wherever your site is installed):
cd $DRUPAL_HOME
drush trp-run-jobs --user=administrator
- Now repeat 1-5 for each content type. Since this step simply creates new Tripal v3 content without touching the existing Tripal v2 content, there really is no reason not to migrate all your content types. Especially since the Tripal v3 content remains private and thus hidden from your users.
Step 3: Use Legacy Templates (optional)
This step is completely optional and not necessarily recommended. It was provided to aid the upgrade process for Tripal sites with lots of customizations who may not have the developers or time to create new Tripal 3 fields to replace their old templates.
All customizations involving re-ordering or re-naming of existing fields can now be done through the Drupal “Manage Fields” Admin interface found under Administration > Structure > Tripal Content Types > [Type you are interested in] > “manage fields”. You can also use this interface to switch from Tripal Panes to a long listing of content, fieldsets, tables, tabs, accordions, etc. I suggest playing around with this new interface and looking into Drupal Field Group and/or Display Suite to explore your options for customizing page display through the interface, since this will ease the transition to Drupal 8.
That said, if you decide to stick with your current customized templates, the following instructions will show you how. Keep in mind this is done on a per content type basis allowing you to do use the new interface on less customized content while still relying on your templates for highly customized content.
- Navigate to Administration > Tripal > Data Storage > Migrate and click on Step 3
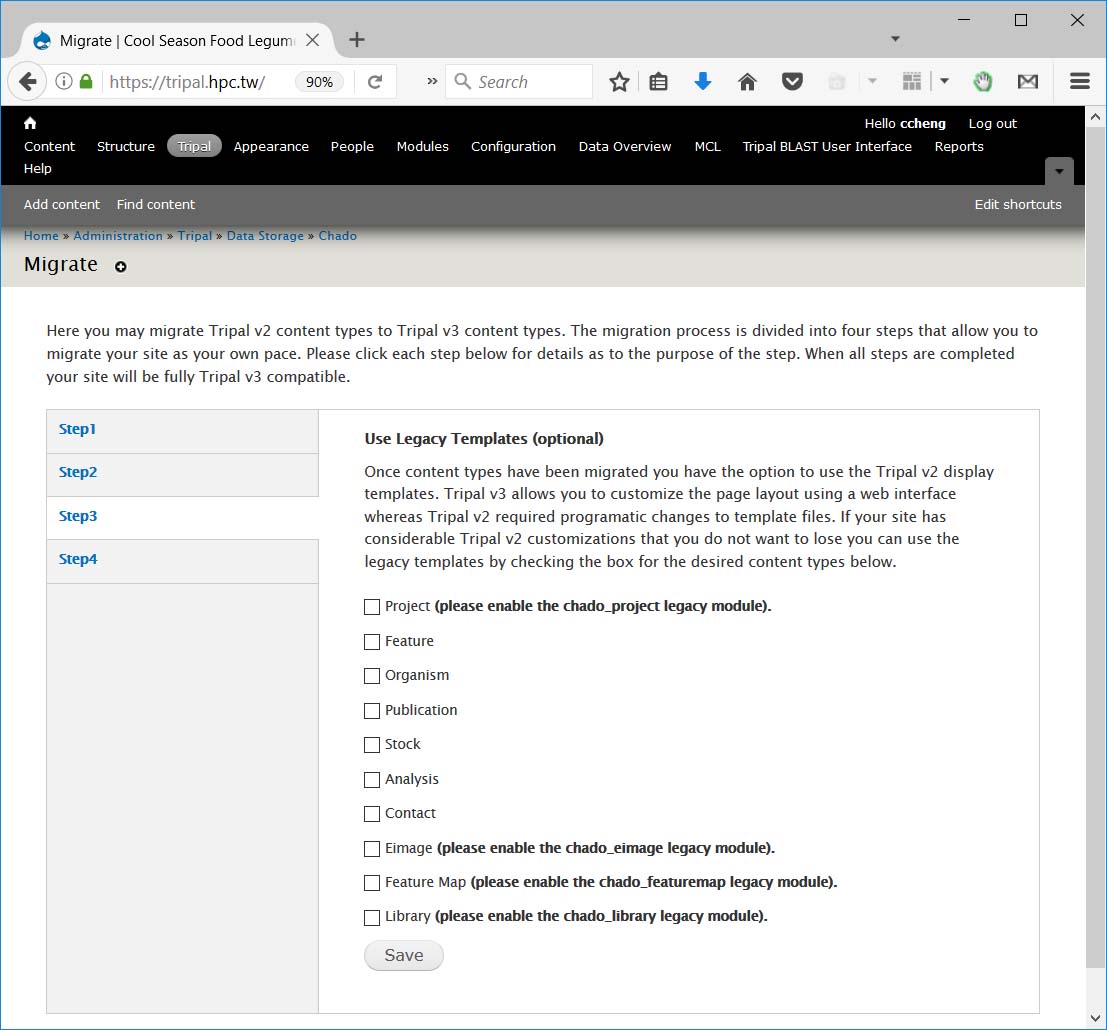
- Click the checkbox for the Tripal v2 content types you want to keep your old templates for. Unchecked content types will use the new Tripal 3 interface.
- Click Save.
Step 4: Delete Tripal v2 Content and Publish Tripal v3 Content
This final step allows you to fully switch to Tripal v3 pages. You can move URLs and titles from Tripal v2 pages to their corresponding Tripal v3 pages. This ensures user bookmarks and external links to your site are not broken. Here you can also unpublish Tripal v2 content types or completely remove them if desired. You can perform these actions in stages such as first moving titles and URLs, then unpublishing Tripal v2 pages and once the migration has been verified you can finally delete the Tripal v2 pages to free space. Deleting the Tripal v2 content will not delete the data in Chado. The page is simply removed from the site.
- Navigate to Administration > Tripal > Data Storage > Migrate and click on Step 4

- Once you have confirmed that you are happy with the Tripal v3 pages for a given content type, check the desired check boxes for that content type.
- Then click submit –This step cannot be reversed!
You have now completed the migration process and can safely disable the Tripal v2.x Legacy modules assuming no extension modules still depend on them.
Note
If you are a developer of Tripal extension modules, then the Tripal API is completely backwards compatible so any extension modules that do not interact with nodes directly can safely be made Tripal v3.x compatible by changing the module to depend on tripal rather then tripal_core (can be done in the modules .info file).
Troubleshooting
- Dealing with
stack depth limit exceededon Step 4 of the Migration.
When there is a large number of nodes, Drupal’s search module fails to update the search_total table and gives the following error:
Uncaught exception thrown in shutdown function. PDOException: SQLSTATE[54001]: Statement too complex: 7 ERROR:  stack depth limit exceeded
HINT:  Increase the configuration parameter "max_stack_depth
You can avoid this problem by clearing out the Drupal search tables byu executing the following SQL commands:
TRUNCATE search_total;
TRUNCATE search_index;
- For sites that have upgrading from Drupal 6:
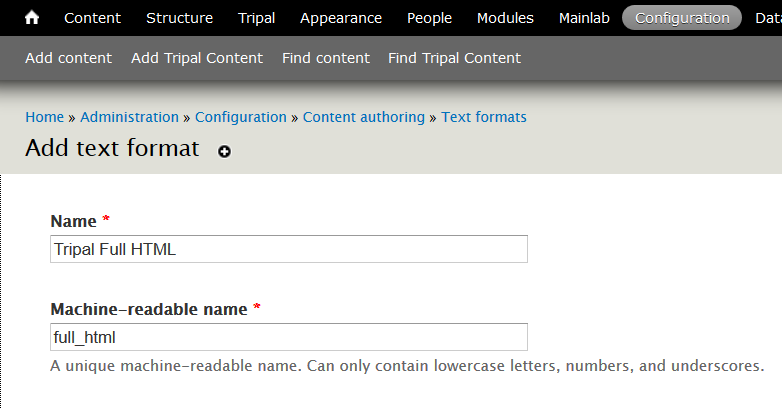
If your site was upgraded from Drupal 6, you’ll need to add a new text format with a machine name called ‘full_html’ as this is the default formatter that Tripal v3 uses. As in Drupal 6, the ‘Full HTML’ text format has a numeric machine name (usually ‘2’) that was later changed to ‘full_html’ in Drupal 7.
To do this, go to Configuration > Text formats in your administrative menu and click on the ‘Add text format’ link:
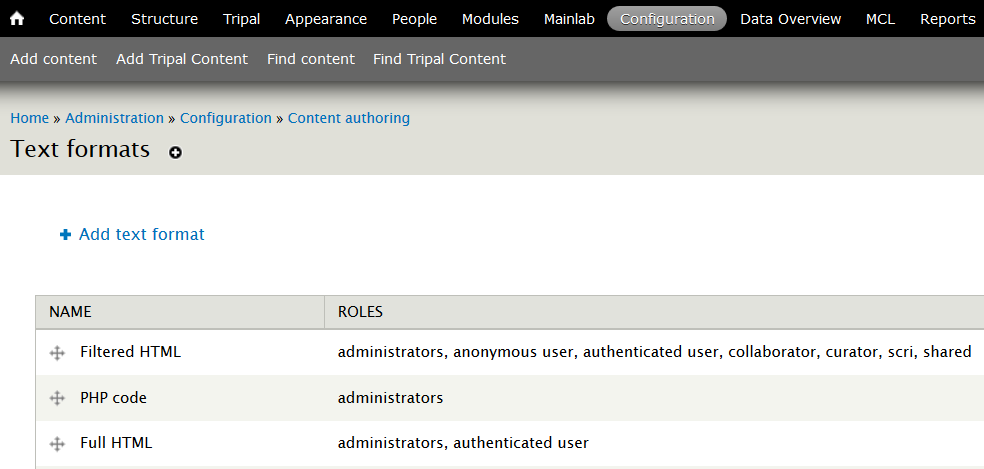
Make sure its machine-readable_name is ‘full_html’ and save the configuration.